
Recently my friend Santhosh and I both attended a webinar on Marvelous Designer with John Gotch via CGSociety and listened to him discuss his workflow and answer questions. I have messed around some in MD, and knowing a bit about patterns might be a help, though from the sound of it, most CG artists who’ve been using it just reference patterns using Google searches.
Santhosh asked me if I had any recommendations for patternmaking books to get him going, and I kick myself for not having my slopers OR my patternmaking book from my undergrad days (I am sensing I never cleaned out my locker?). BUT I did remember having a series of 1/4 scale patterns, showing how you can pivot darts around into various areas of a basic bodice pattern.
This is probably more than you ever wanted to see, Santhosh. But let’s pattern!
So just in case, the primary point of this lesson involves darts, which if you don’t know are used when sewing woven fabrics (like your basic jeans, or a man’s collared shirt…something that doesn’t stretch) to accommodate areas like the bust or hips so the garment still hugs the body. Darts are not necessary for knits and some stretch fabrics….because they stretch! Basically, you sew the two lines of the dart together lining up its notches at the bottom. Let me show you.
This is half a bodice front pattern. In essence you’d just stick that nice straight line on the right of the pattern (your Center Front, or CF) on a fold of fabric so when you cut the front bodice out you have both sides symmetrically. I’m not going to get into fabric grains because this really it just to show some basic shapes for the purposes of using Marvelous Designer. So just keep that straight up and down for now.
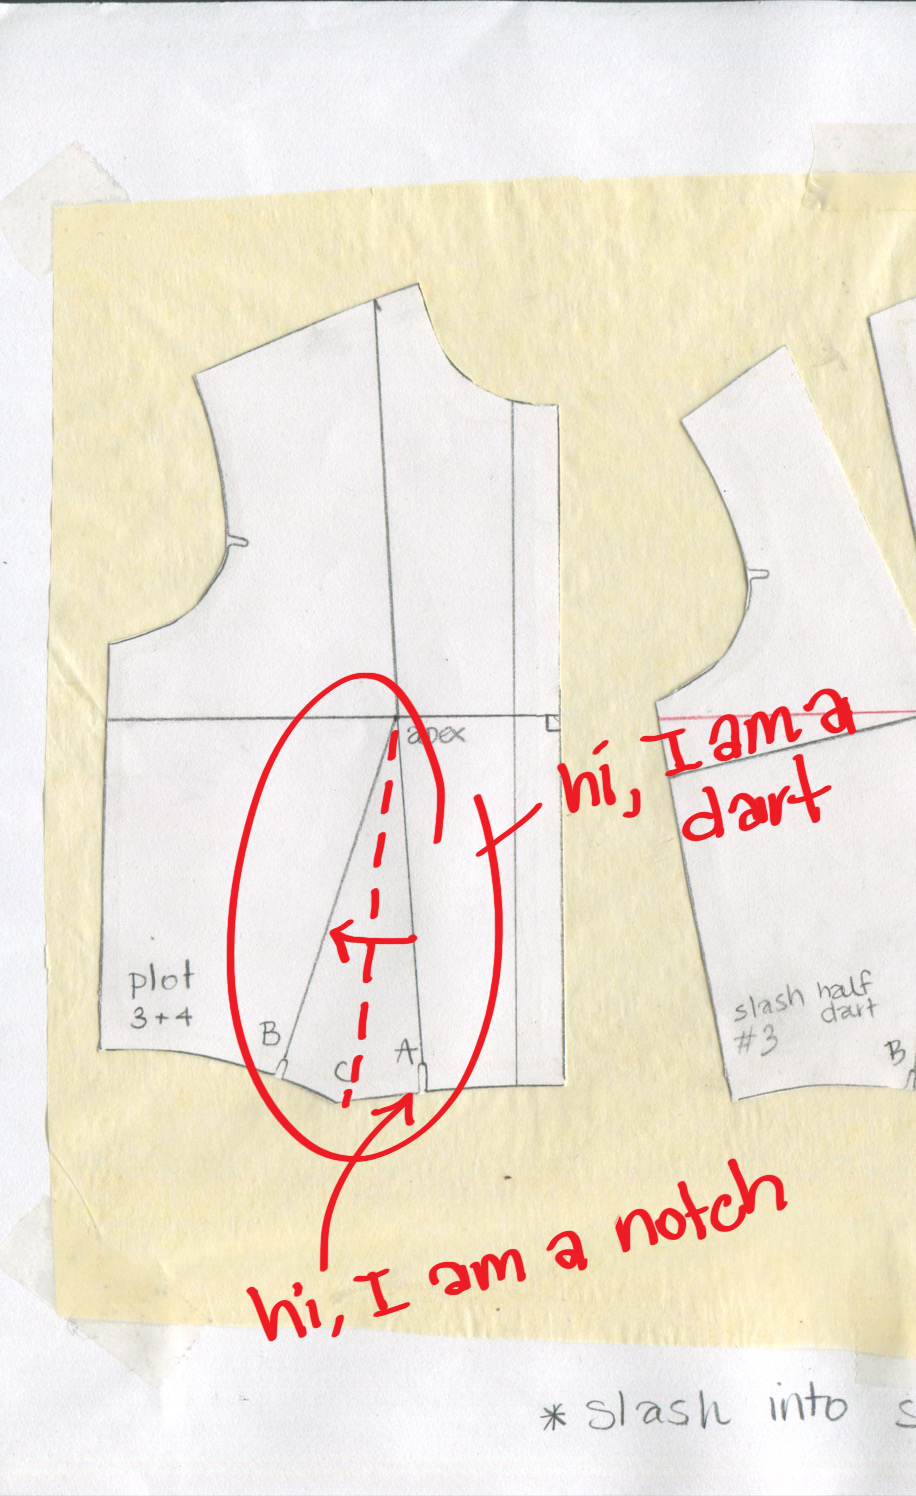
This is a very basic bodice pattern with a hem that would end up right on the natural waist. If you match the notch on the bottom to the other notch on the bottom, those two solid lines would be sewn together, and the dotted line I drew in red is where it would fold on the inside. The apex, where the dart ends, is the full point of the bust, ie. that’s where the nip goes. You know I couldn’t keep the convo so clean. Let me give you the image without the writing, and in this example you can see how I pivoted the pattern around from having a waist dart (marked plot 3+4), to have a shoulder dart instead (#4). You can also use #3 and have both darts if you wanted.

Another spot to pivot a dart into is the armhole. Make sure you follow anything my instructor corrected in red, because she knows best….and I am the queen of missing notches (which can also be marked by that delightful little ‘T’ shape). Note these patterns below have seam allowance unlike my plots above. This is so you have room to sew all your pieces together without making the pattern too small.

Here’s how we pivoted the waist dart into an armhole dart.

Here’s another classic courtesy of IsntThatSew.org…princess seams.

This pattern is showing you a two-piece front bodice on the left, and a two-piece back bodice on the right. Note the difference in your basic neckline shape from front to back. Much higher in back, but even in the front this is going to sit right on the collarbone. If you want a scoop neck or a square neck or a v-neck, just draw that in, and of course in MD, you can quickly simulate what it’ll look like.
Hopefully that give you a decent idea of your very basic bodice front shape. You can now feel free in MD to lengthen it, or use a stretch fabric, in which case you don’t need a dart for fit. But you might want to use these ideas to create design lines, i.e., seams simply for aesthetic purposes. A classic for sic-fi bodysuits is using the princess seam, but instead of following the line all the way up into the shoulder as above, it curves into the armhole like this:

Image above courtesy of The Cutting Class. You can continue that line down the body if you lengthened the shape into a dress, with or without a waist seam. Making shapes in MD is much easier once MD5 added a cutting feature, something you’re really going to want when flat patterning.
So what if you’re drafting a pattern for a dude? Menswear patterns don’t really need the darts since men don’t have boobs. You can take these basic shapes (look back at the one marked Plot 3+4) and just draw it without the dart – and then you’ll want to straighten that hem perpendicular to your center front. Voila!
Moving on…let’s look at skirts a bit.


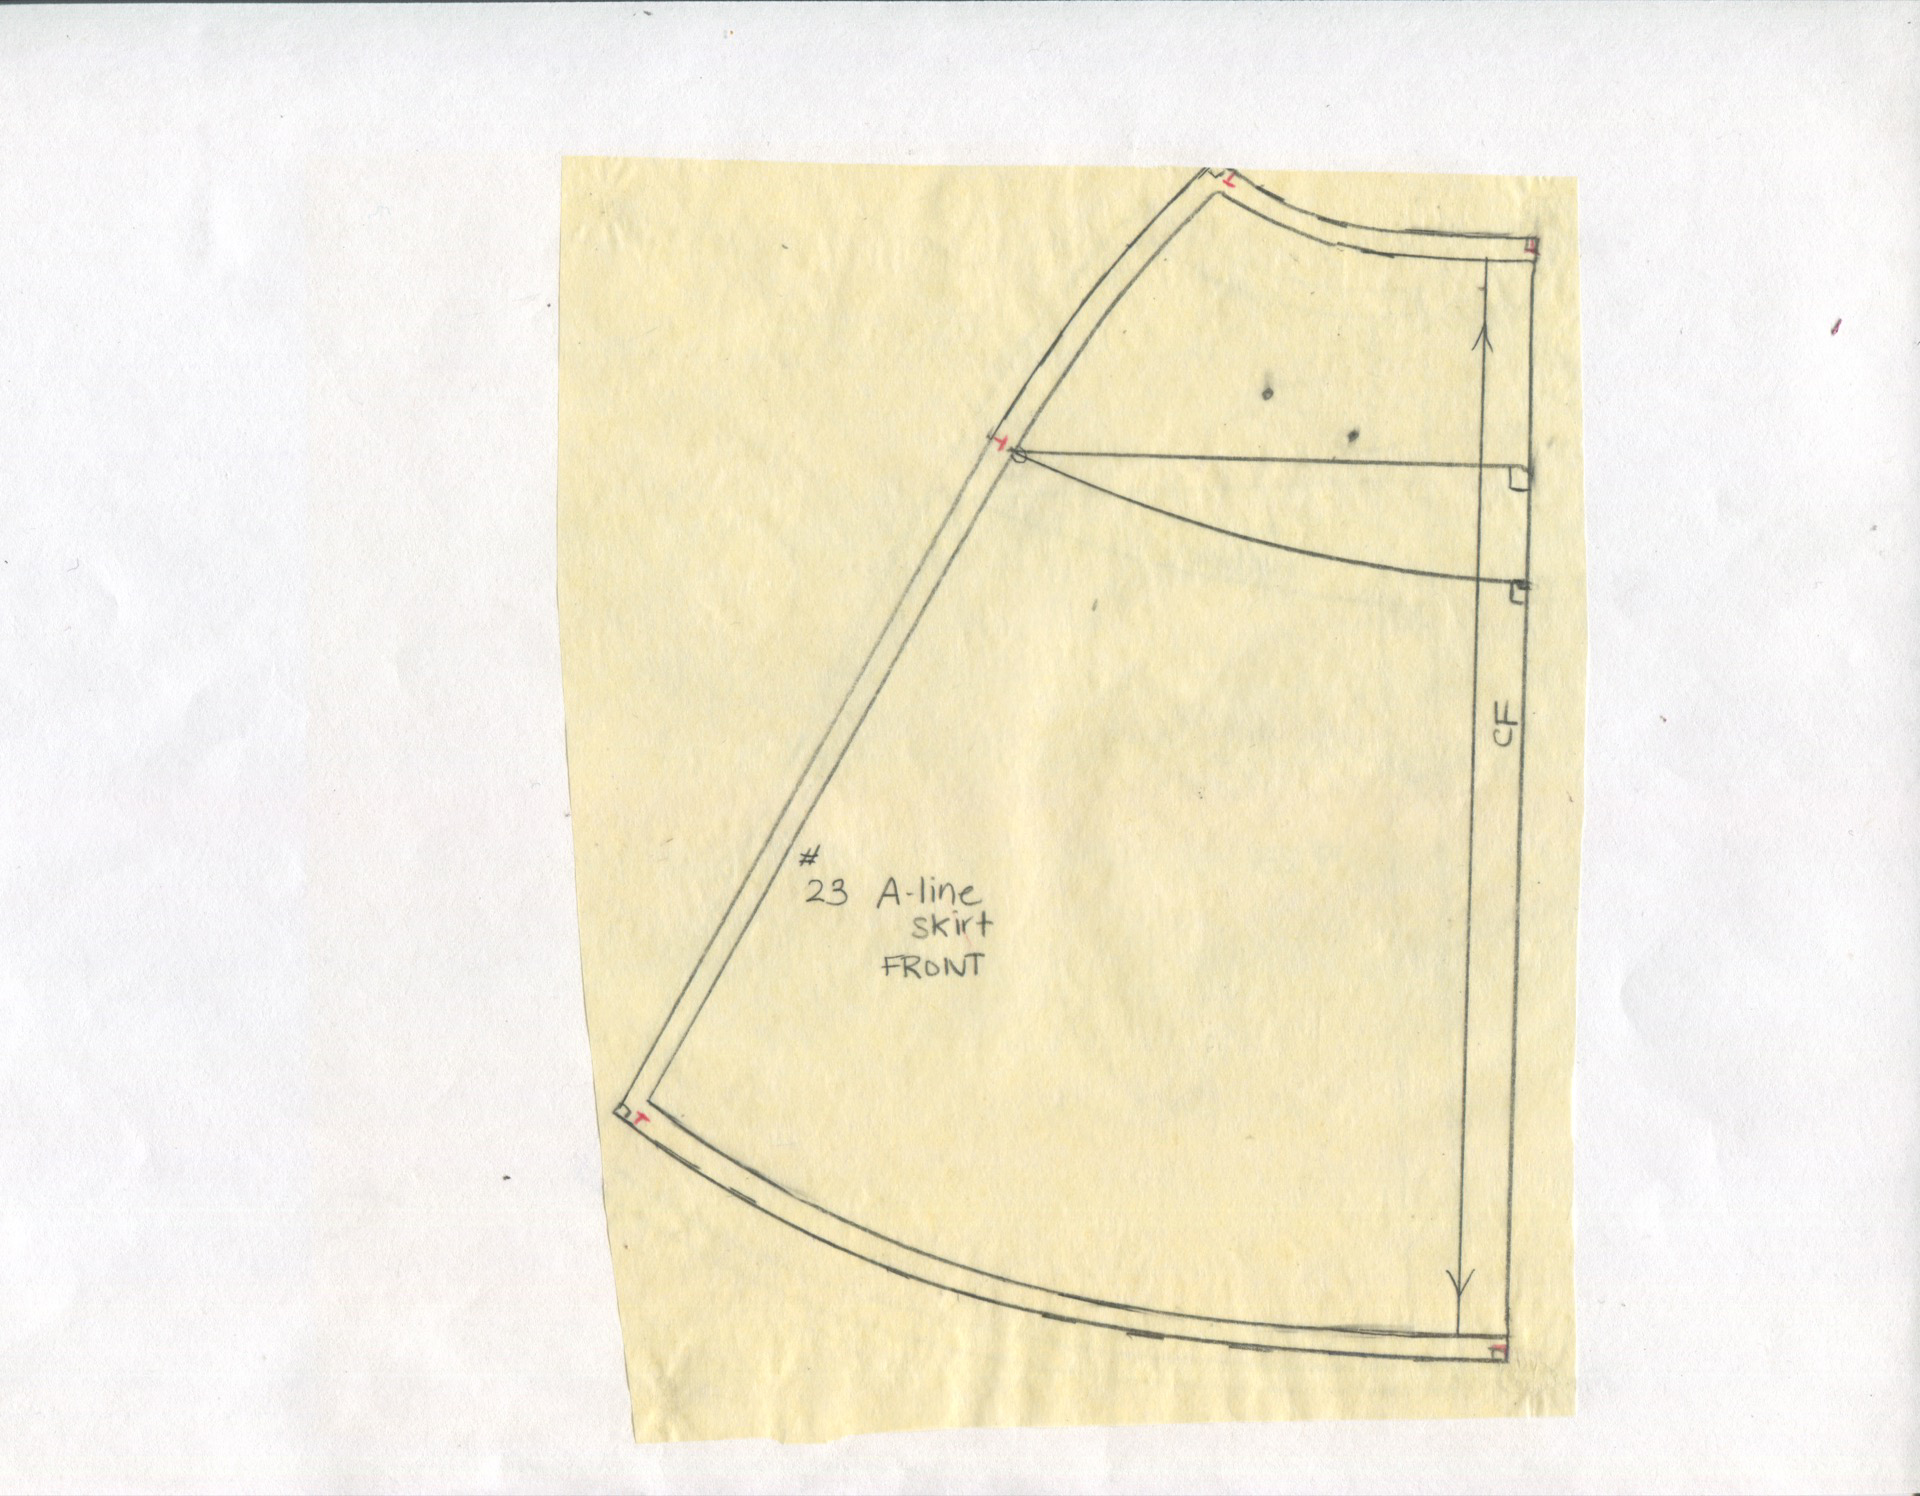
Note on the left of each picture we have a basic straight skirt shape with two waist darts. Again, this is half a skirt front and back, and would be cut on the fold, unless you wanted the seam down the center front and back. Here I’m slashing up those lines and closing the darts to create what is known as an A-line skirt (because it’s shaped like an A…real clever). Here’s what the A-line pattern would look like:

Skirts and bodices are typically what you learn to draft first in a patternmaking class, but to be honest (and this is coming from someone who kind of sucks at patternmaking) pants are NOT really hard. Let me look around for some good pant resources and I’ll create another post on that and sleeves next. Sleeves are not hard to pattern either, but they can be a bit of a pain to set into an armhole. Happily, MD will do all that work for us! Phew!
